week 5 (7/10/24 - 13/10/24)
On Monday I learnt how to sew my different pattern pieces together. This was tricky because I had never sewn darts before, I learnt that you have to curve the dart a little bit, not sew it straight so it can properly fit around the body.
On my first dart (front piece) I accidentally didn't catch the edge of the fabric when I sewed the stitch straight down, so I had to re-sew the dart over that part which created a little bit of bulk. I made sure to iron the darts on an ironing ham which curves so the curves are more prominent.
On the second
dart (the other front piece) I accidentally used the wrong
side to sew the dart, in the future I need to make sure that I cut out the
different patterns, so they point the right way. Essentially, I had cut it out
so the split wouldn't join correctly when put on the body. This is especially
crucial if the fabric has a clear right and wrong side to it.
When overlocking the
pieces, I did remove a few mm off the side and my seams were slightly uneven in
places, I think I should do some more practice with the overlocker at home to
get better at my accuracy with the machine. One point with the split did end up
being slightly bunched up which increases my drive to keep practicing making
this better.
After those two
Processes I sewed the side seams together, ironing the seams open and pinning
the front seam together and marking out the different considerations i would
need to make. I learnt that it is important to leave enough space for the
zip and not sew the split closed, this only left a small segment that needed to
be sewn shut.
The final part of my
lesson was my mitred corners, this part was challenging for me since I found it
hard to remember how to apply a mitre. It was my first time sewing a true mitre
for the hem of a garment, not just a square of fabric so I found it difficult
to apply the mitre in the correct way. To help, I asked Lareen for assistance,
and she helped me to use my eyes a little bit better.
Overall, I think I
did do a good job during the lesson but there are still things that I need to
learn since the front and back pieces did end up being slightly different
lengths. I also need to do more work with overlocking and mitred corners.
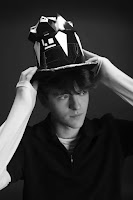
After lunch I worked
on finishing off the final details of my hat and then it was time to photograph
it. I went first and my partner started by wearing his hat and we tried out a
few different poses, getting myself used to the camera after a while. One thing
I noticed when looking back at the photos is that they are all close up and
have more basic poses. I think if I could redo this photoshoot I would take
full body photos with a wider variety of poses.
At home I worked on
the hem of my toile where I realised, I needed to cut into my mitre a little
bit to be able to fold a double rolled hem. To make the hem even throughout the
skirt I folded the uneven back length into itself so more of it was folded and
created an equal hem of 2.5cm. This is noticeable but only slightly since the
front pieces so a bit of the overlocking, but the back doesn't.

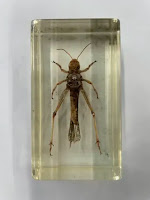
After lunch I spent
my next lesson depicting insects using different mediums and methods to capture
the differences in the insects, doing closeup ones of a specific part of one of
the insects and then full body ones from different angles. This was more
practice in trusting myself and getting on with the work I'm doing since some
of the methods did make me feel a bit uncomfortable to do. I think some of the
not looking pieces gave me the most intriguing outcomes, especially the one
where it was not continuous to it looked like it was separated into different
segments.
Computing was spent
using Photoshop to edit a random picture we found on the internet. I did not do
this and instead I used one of my dad's pictures on his photography website to
edit. This was fun as it was like I was back in my photography lessons in
school that were light-hearted and all about experimentation. I learnt the
difference between destructive and non-destructive processes when working on
editing pictures. I had already applied these processes before, but I didn't
identify the differences between destructive/ non-destructive methods.
I found that creating
a displacement zone for the zip was quite difficult for me. I found it hard to
understand so I think I will do a page on it in my book for future reference. I
learnt many different key points that all mostly blended together for me
because it was being told to me. I am more of a visual learner but because of
the words I found it harder to focus on the things shown on the projection. I
also found it hard since Lareen was only using two separate pieces of fabric
not a sewn together skirt so it was different to visualise how it would
actually be applied. However, by asking and looking at other people’s work I
was able to get a decent grasp on how to do it.
Another thing I found challenging was the sewing of the zip, I didn't finish it but I started it and the zip moved in slightly when I sewed it so the edge of the zip does not line up with the edge of the placket, I will look to improve this skill for my final design.
When I was home, I
continued to finish off my zip where I attached the zip and the placket to the
right side when worn side of the fabric and then the other side of the skirt.
The first part wasn't too hard, only a top stitch, remembering to keep inside
the middle of the displacement zone and the original seam allowance. However,
the part where I attached the second part of the zip to the other side. I
pinned the placket out of the way so I wouldn't sew on it, lined up the zip and
edge of the left side when worn so that when it sat the left side would lap
over and sit where the original seam allowance of the displacement zone would
be. I found it hard to pin it (I pinned it bottom to top) because it
wouldn't lay flat (mainly due to the bulk of the zip slider). I tried to sew it
three times before settling with what I had and making notes on what went
wrong.
Thursday was spent
finishing the insect section of my sketchbook and making notes, this was alright,
but I felt like my annotations were a bit lacking. I also went through and
remembered to link all my work to research that I have done if I can.
During class on
Friday, I worked some more on insects by monoprinting on fabric, I enjoyed this
task that I did, and I found that the lines created by the monoprinting created
an interesting design, especially when paired with the fabric. One thing I
didn't like was stains that came from the ink that I was mono printing on. They
interfere with my work and don't really add anything to the overall piece. I
also decided to do some more work on black paper, using oil pastels I drew some
of the insects in inverted colours. I like this one, but oil pastels are hard
to be too detailed with.
Over the weekend, I
went through and made sure I had annotations for every single drawing I did,
completed my section on fish and covered most of my research pages, printing
images and writing a fair amount on their work and what I can see and what I
like about them.


Comments
Post a Comment